If you are reading this you are probably in the market for a new combi boiler installation. But what happens in the process of the installation?
In this article, we are going to be talking about the installation of a combi boiler replacement. Ie you already have a combi boiler and would like a replacement combi boiler fitting.
Once you have had your home survey carried out by a local boiler installation company. They will have taken some key information to enable them, to offer the best, most cost-effective solution. This will be the best solution when it comes to heating your home for the next 15+ years. To read more about our home survey process read here.
So the boiler has been specced, the quote has been accepted and you have been given a date for your new combi boiler installation. But what happens on the day?
Your engineer(s) will arrive in the morning armed with your new boiler, flue and any extras. along with a smile and all the tools and equipment to get your new boiler up and running.
The first job is to have a coffee and a chinwag (just kidding). The first thing we do is to protect your carpets and flooring. We do this by installing a temporary adhesive membrane. Its the first thing down and the last thing out, meaning that your carpet is fully protected throughout the entire job. We then use dust sheets and work mats in the work areas.
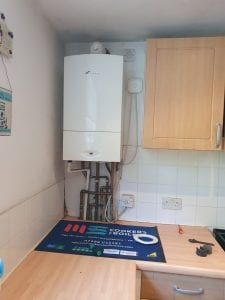
Once your house is protected we then get the tools in and begin. The first step is to empty the heating system of all the system water (draining down). Once the system has been drained down and the water has been isolated. The gas supply is then pressure tested we can then begin to decommission and remove your old boiler.
The flue is then disconnected and removed. The pipes are disconnected and chopped back. And the electrical supply is isolated and disconnected. We can then lift your old boiler off the wall and remove from your house.
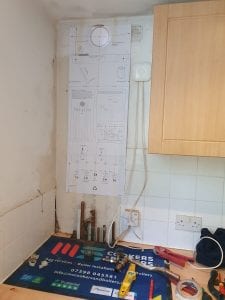
The boiler hanging template is fixed to the wall and the fixing holes, along with the flue hole are marked. We then drill a new flue hole (if required) drill the fixing points and secure the bracket or jig to the wall.
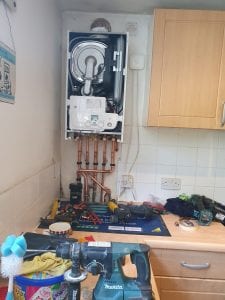
We can now lift your new boiler onto the jig and secure it to the wall. The new flue pipe is then cut to length, Made into the elbow on the top of the boiler. And secured with screws and cemented into the wall. There is then a weather seal on the outside and a cosmetic seal on the inside.
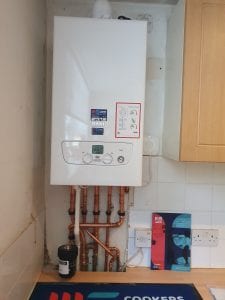
Ok, so now the new boiler is on the wall, the flue is on, connected and sealed. The next stage is to install the new pipework to the boiler. The five copper pipes underneath are the central heating flow and return. The hot and the cold water pipe and the gas supply. The white plastic pipe is the condensate pipe. The pipe that disappears through the wall is the pressure relief pipework.
Once these connections have all been made and tested. The wiring for the boiler and a new programmer can be carried out. Depending on what controls you have on your existing boiler. You may or may not need to upgrade due to the ‘boiler plus’ legislation that came around in April 2018.
Your new boiler installation is now well on its way to being completed. The boiler is on the wall with the new pipework installed, it now needs to be flushed and filled. There are three different levels of flushing we use when it comes to your heating system. The best course of action for your installation. Will depend a lot on the state of the existing heating system.
After a flush, your heating system will be clear of all sludge and debris. The water will be running clear from each radiator. The system then has an inhibiting chemical added, this is to prevent future corrosion.
The final thing left to do is to commission your new boiler installation. Register the manufacturer’s warranty, and register it with Gas Safe to get your ‘Building Regulations Compliance Certificate’
To find out how MS Cookers and Boilers can help with your new combi boiler installation click here to get a quick online quote

